
Chapter 5 Lab Exercise: Measuring Characteristic Impedance and Propagation Velocity (Method 1)
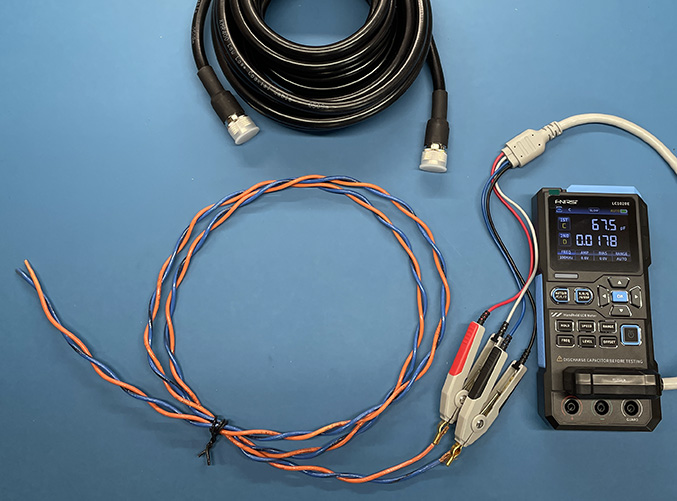
An inexpensive RLC meter can be used to measure the inductance per unit length and capacitance per unit length of a cable with sufficient length. These values can be used to determine the characteristic impedance and the propagation velocity. This can be done as a classroom demonstration or a laboratory exercise.
Preparation: Students need to know how to operate and calibrate the RLC meter.
Equipment Required:
- RLC meter with Kelvin probes
- about 2 meters of 50-Ω coaxial cable
- about 2 meters of twisted-pair cable
Procedure:
Step 1: Set the measurement frequency of the RLC meter to its highest value (typically 1 kHz - 100 kHz). With the Kelvin probes attached, perform an open-circuit and short-circuit calibration of the RLC meter.
Step 2: Connect the probes to one end of the coaxial cable and leave the other end open. Measure the capacitance between the two transmission line conductors and divide by the length to get the capacitance per unit length.
Step 3: Now short the conductors at the far end and measure the inductance. Divide by the length to get the inductance per unit length.
Step 4: Use the inductance and capacitance per unit length to calculate the characteristic impedance and velocity of propagation in the cable. How does the measured characteristic impedance compare to the nominal 50-Ω impedance? Compare the propagation velocity to the velocity of light.
Step 5: Repeat the measurements above for the twisted wire pair.
Notes:
If you have a large spool of cable available, have the students repeat these measurements on the spool, measuring R and L shorted and G and C open. For very long cable lengths, the measured input impedance approaches the characteristic impedance whether the far end is open or shorted.